
SAM Cloud Feature Spotlight: Automation Scheduling
SAM Broadcaster Cloud is the online radio solution that makes having an internet radio station super simple to operate and manage. SAM Cloud’s automation scheduling features make it even easier, helping you automate your station content and keep your station running 24/7, even if you aren’t around. Pretty helpful, huh? So, let’s take a closer look at SAM Broadcaster Cloud’s automation scheduling features.
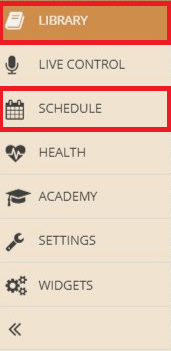
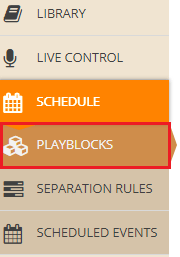
SAM Cloud has a comprehensive set of features that aid you in successfully automating your station. The four features which work together to deliver SAM Cloud’s automation are Playblocks, Separation Rules, Scheduled Events and Tasks. These features, when combined with music library features such as Filters and Playlists, allow customers to fully automate their station’s scheduled output. Playlists and Filters are located under the Library tab, whilst the other features are available under the Schedule tab.
Playlists and Filters
Playlists and filters are used to build your Playblocks. A Playlist can include a single track or up to 30,000 tracks. Single-track playlists are useful if you want to play a specific track at a specific time. You can add the contents of one Playlist into another Playlist as well as adding the contents of a Playlist to the top or bottom of the Queue.
Some Filters are dynamic, for example, the Filters based on the track upload date which can be used to always keep fresh music playing at specific times (as long as you keep uploading new tracks, of course). Some Filters relate to music categories and can be used to play Station IDs or Promos in your rotation.
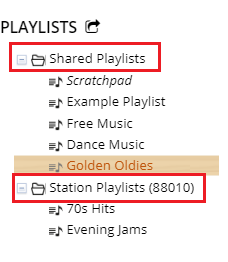
SAM Cloud enables you to share a common music library between a maximum of 50 stations and to separate content where necessary; there are two types of Playlists, Shared Playlists and Station Playlists. Shared Playlists are available to all stations under the same service whilst Station Playlists are only available to a single station and can only be accessed by logging in to that station.
Giving your Playlists meaningful names and sorting your library into these Playlists makes it simple to locate the tracks you are looking for and makes identifying the Playlist content simple. We would recommend following a naming convention to simplify your Playlist management, for example, by prefixing the name of every Playlist containing tracks from a single artist with the word “Artist” to give Artist-James Blunt, for example, ensures all of your artists will be listed alphabetically. By expanding this you could use the prefixes of Decade-, Language-, Album- and so on, to ensure your Playlists are not only listed alphabetically but also in groups based upon the Playlist contents
How to Create a Playlist
To create a Playlist, simply right-click on either Shared Playlist or Station Playlist. Then select New Playlist and give the Playlist a title. It is not possible to convert a Station Playlist into a Shared Playlist or vice versa, however, if you find you have created the wrong type of Playlist, simply create a new Playlist with a temporary name as the right Playlist type, drag the existing Playlist onto the new Playlist and when the icon turns green, release the mouse button. Then delete the original Playlist and rename the new Playlist, simple!
Separation Rules
SAM Cloud includes a fairly comprehensive set of Separation Rules that enable you to be compliant with your local broadcaster rules; you can edit these existing Separation Rules or create new ones based on your individual requirements.
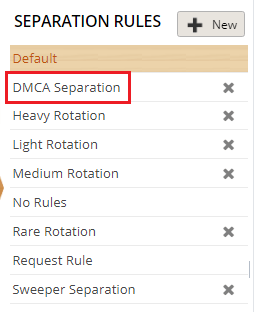
We recommend creating your own custom Separation Rules and leaving the default provided Rules in place; especially the DMCA Separation Rule, which is a statutory requirement if you broadcast within the United States.
Creating or Editing a Separation Rule
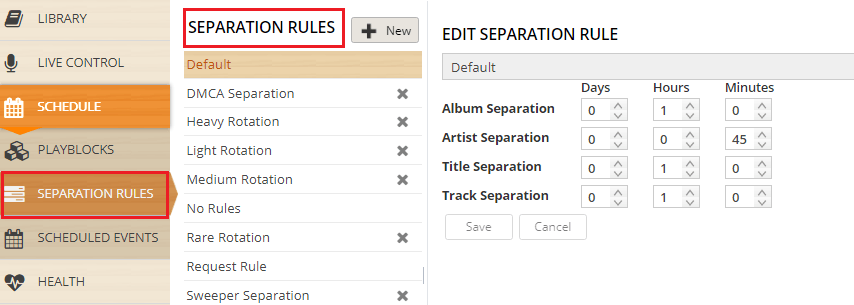
On your navigation tab, select ‘Separation Rules’ which falls under the ‘Schedule’ tab.

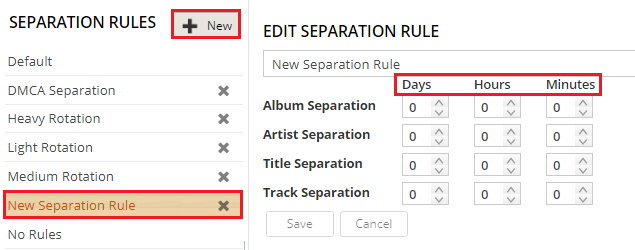
To create a new Separation Rule, simply click ‘New’, and a new Separation Rule will appear, and you can name the new Rule under the Separation Rule Editor. You will see four separation categories in the Separation Rule Editor available for configuration; these are Album, Artist, Title, and Track. These options allow you to set a specific time period before another track from the same Album or Artist is played as well as to separate different tracks with the same title, for example, Huey Lewis and The News – Power of Love and Jennifer Rush – Power of Love, as well as preventing the same track from replaying before the specified time period.
You should also consider the number of tracks you have within the location the Separation Rule is used. If you are applying Separation Rules to a Playblock which has a small number of entries and within this Playblock, selecting a track from a Playlist which only contains tracks from a single artist then when the Playblock has returned to this entry, a very long time period in the Separation Rule would prevent the Playblock entry from playing. The available separation time options for each Category are days, hours, and minutes.
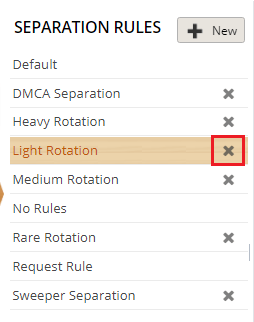
To delete a Rule, simply click the [X] associated with that particular rule. Please note that once deleted, there is no undo button and you would have to recreate the Rule if you removed it.
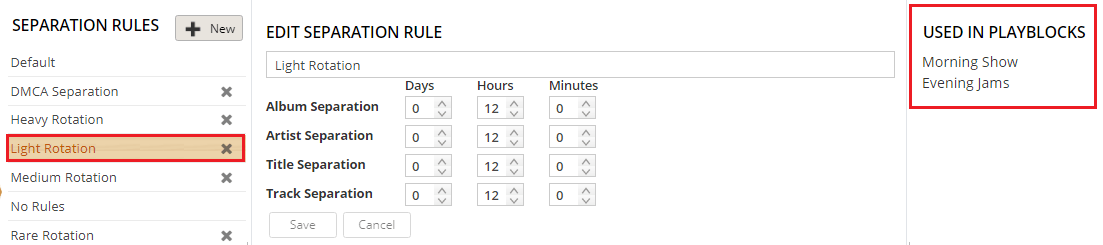
When a Separation Rule is selected, you will see all of the Playblocks that currently use that specific Separation Rule displayed on the right-hand side.
Playblocks
Your SAM Cloud Station comes with two default examples of Playblocks that can be used to run your station. These are provided as examples and to ensure your station is running when you first log in. Creating new, custom Playblocks is relatively straightforward.
Creating a Playblock
Within the Schedule tab, select ‘Playblocks’, and then click on ‘New Playblock’. Edit your Playblock title in the ‘Edit Playblock’ window with the title indicating the Playblock theme or corresponding radio show for easy identification.
To add Details to the Playblock, simply drag the required details from the list of available Playlists and Filters to create the Playblock. You will notice that each new Playblock contains one default Detail which you can edit or delete.
Once you have finished creating your Playblock, click save.
Failover Logic
When you create a new Playblock, we strongly recommend that you turn on the Failover Logic. The Failover Logic option can be found on the top left side of the Playblock window under ‘Active Playblock’ as pictured below.
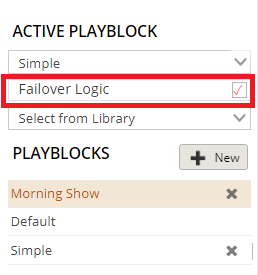
Failover Logic will kick in and select a random track based on the Playblock Detail if, for whichever reason, SAM Cloud is unable to play the next track from the Playblock Detail. If the Failover Logic is turned off, SAM Cloud will continue trying to pick up the track from the Playblock Detail until it succeeds. However, this may result in dead-air, as well as a potential loss of listeners. Below the Failover Logic option, you can select whether the replacement track is selected from anywhere within the Music Library or only from Playlists shown under the specific station. This prevents tracks from a different station playing.
Editing Playblocks
Each Playblock Detail consists of three parts: the Category, the Separation Rule, and the Logic.

The Category refers to the Playlist or Filters from which the Playblock selects played tracks. The Rule refers to the Separation Rule that limits the frequency at which a track, artist, title, or album may repeat in a given timeframe. The Logic, in turn, decides which track to select from the tracks in a specified Category that passes the Separation Rule.
When you have added the Detail, you should also select the required Separation Rule for the detail and the track selection Logic.
‘Least Recently Played’ will select the track which was played the least recently but in a new Playblock or Filter, none of the tracks may have been played previously and in this instance, the tracks will be selected at random. Selecting LeastRecentlyPlayed will eventually lead to a Playlist or Filter being played in a specific order and you might like to consider creating a Scheduled Event to shuffle the contents of the Playlist.
‘Playlist Order’ will play the tracks in the order they are found in the Playlist, starting from the top and moving down.
‘Random’ will select tracks at random and in this instance, you are relying on the Separation Rules to keep associated tracks apart.
Finally, we can select tracks using the Weighted option. Track Weighting can be used to play tracks with a higher Weighting more frequently than those with a lower weighting.
As we have seen, building a new Playblock is as easy as drag & drop, but they do require some editing afterwards.

When you create a Playblock, consider the purpose and theme of the Program or Block that you are creating. Consider selecting different categories for each Detail, varying the Separation Rules and the Logic.
Playblock Validation
Playblock Validation helps you validate your Playblocks before you put them into production, ensuring smooth sailing for your automated content. Playblock Validation validates each entry or detail within a selected Playblock and confirms whether the set conditions are suitable for a 10-day playout. The ‘Validate’ button is available on the ‘Edit Playblock Window’, and you can validate a Playblock either before or after saving it.

There are visual notifications that pop up to indicate the status of each Detail within the particular Playblock with three possible outcomes for each Detail: Success, Caution, or Error.
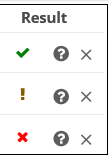
Success (✓): This means that there are enough tracks in the selected category to satisfy the chosen Separation Rule for a 10-day period.
Caution (!): This indicates that there is no immediate issue with the number of tracks, but that one could arise. You should reconsider the number of tracks, the Separation Rule, or both.
Error (x): This means that there is an insufficient number of tracks or that the Separation Rule is too restrictive.
Please be aware that the Request Category will always show ‘Caution’ unless you already have listener requests queued. This happens because the Request Playlist is empty by default. When someone requests a track, it is added to the Request Playlist, and it is removed once it has been played.
Tasks
While Playlists and Filters are the building blocks with which you create Playblocks, Tasks are the building blocks with which you create Scheduled Events in SAM Broadcaster Cloud. SAM Cloud includes an array of tasks that are designed to assist you in automating your online radio station.
Tasks can be created within ‘Scheduled Events’ which falls under the Scheduled tab. To create a task, click on the red plus sign at the bottom right side of the schedule calendar or you can click anywhere within the calendar to create a new event. You should see a window that allows you to create new tasks and schedule events.
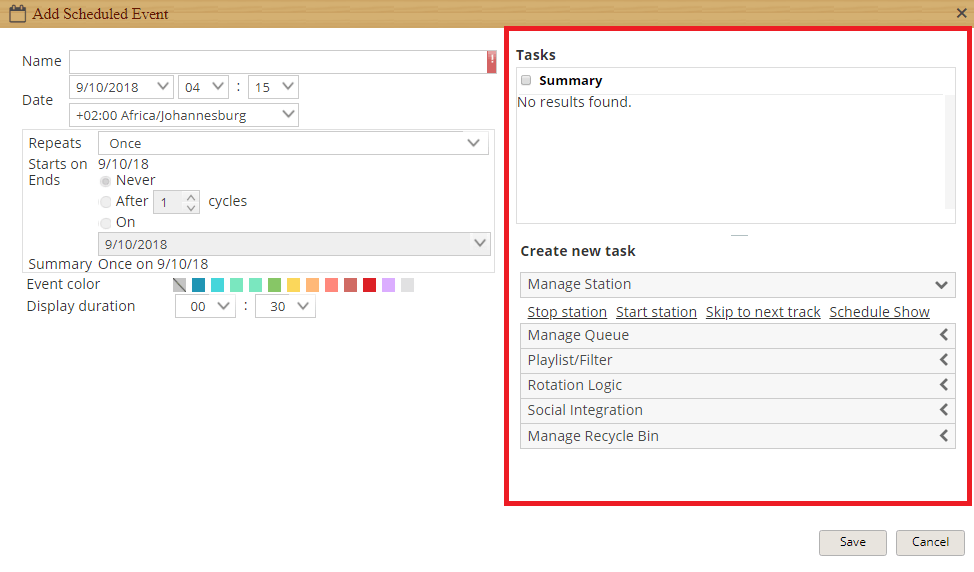
SAM Cloud’s built-in automation tasks are split into six separate sections. These are as follows:
| Section | Tasks |
| Manage Station | Stop Station, Start Station, Skip to Next Track, Schedule Show |
| Manage Queue | Clear, Shuffle, Loop On, Loop Off |
| Playlists/ Filter | Clear, Shuffle, Add to Queue, Add to Filter, Add to Playlist, Recycle Filter, Recycle Playlist |
| Rotation Logic | Switch to Playblock, Pick Track from Playlist, Pick Track from Filter |
| Social Integration | Share Message, Change settings |
| Manage Recycle Bin | Empty Bin, Empty by Age |
‘Playlist/ Filter’ and ‘Rotation Logic’ both have additional options available. These options become available when you select a particular task which falls under one of these two options.
As an example, if you select any one of the options that fall under the Playlist/ Filter section, you need to select the particular Playlist you want to set Tasks for from the drop-down menu before you set the Tasks.
On the other hand, the Rotation Logic’s ‘Switch to Playblock’ task allows you to select a specific Playblock from a drop-down menu.
Scheduled Events
Without Scheduled Events, you would have to manage your queues and alter your Playblocks manually. SAM Cloud makes this process efficient by allowing you to automate your online radio station operations with Scheduled Events. Simply put, Scheduled Events are used to fully automate your station when you are not actively manning the ship or broadcasting live.
You can use Scheduled Events to schedule any of the available tasks (discussed in the previous section) to execute them on a specific date and time. Tasks can be scheduled as single, one-off events, or as events that repeat on a daily, weekly, or monthly basis.
You can schedule different shows or programs that occur during different times of the day, for example, a Breakfast Show, Afternoon Show, and an Evening Show. Scheduling events in advance can help you to build a station that has a wealth of varied music and programming.
How to Schedule Events
You can schedule events by selecting any time and date from the Schedule Calendar or by clicking on the red plus sign at the bottom right side of the schedule calendar. The Schedule Calendar is available under the Scheduled Events Tab.
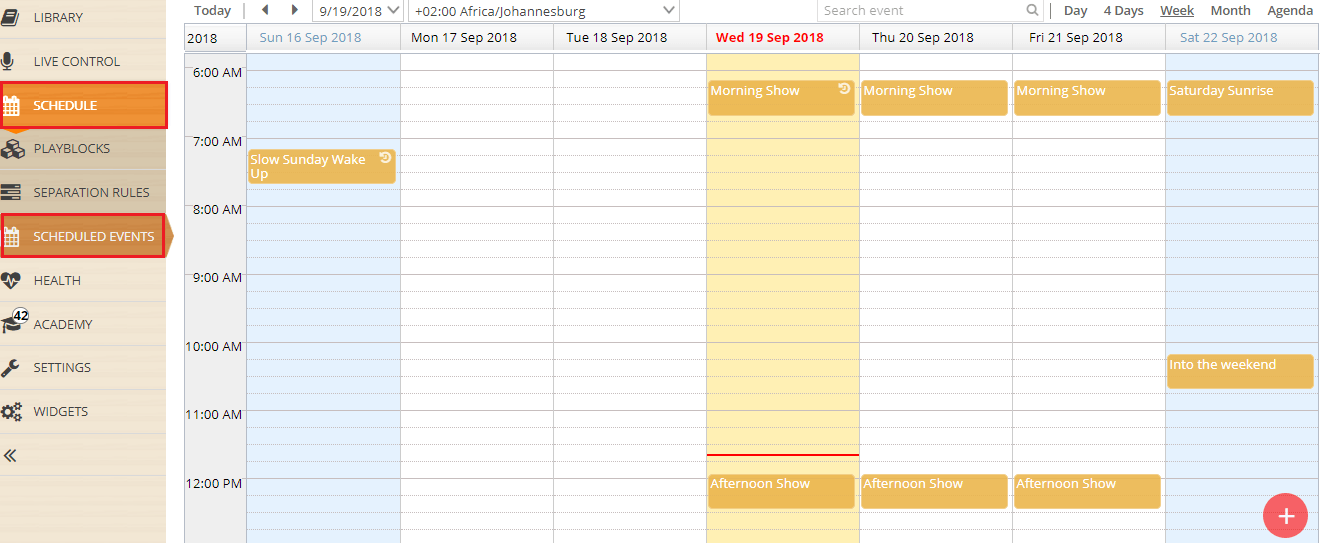
You can change the Calendar View to show your preferred display; available displays include day, 4-day period, week, or month views. Events that have already been scheduled display at their allotted starting times.
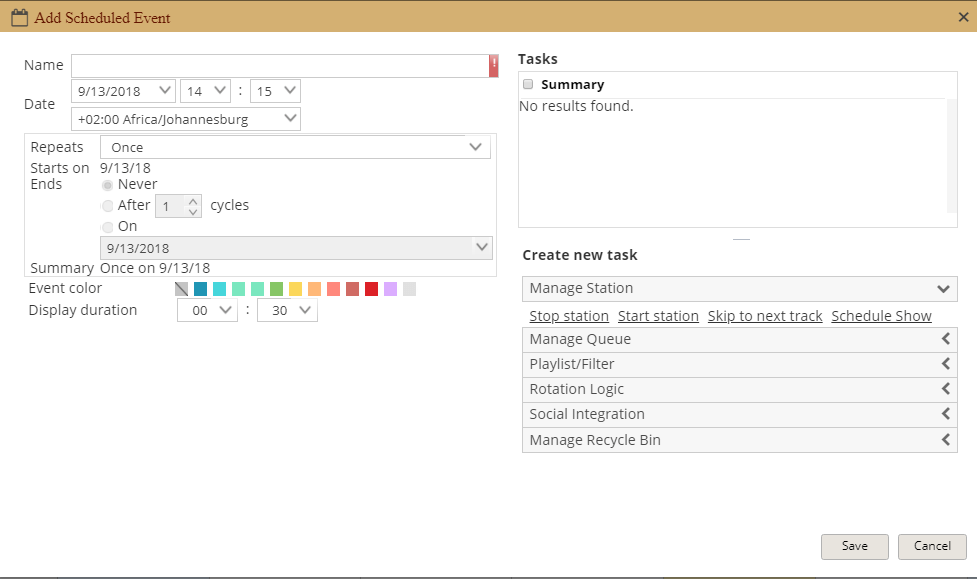
Events can be scheduled by clicking on the required date from the month view, or by clicking on the required date and time in the remaining Calendar Views. Alternatively, you can click on the red plus sign in the bottom-right corner to create an event. This will, in turn, bring up a “Create Event” prompt.
Click on ‘Create Event’ to bring up a ‘Scheduled Event Editor’. As previously mentioned, Scheduled Events are made up of different tasks. In this window, you can create your event by specifying the various Tasks, as well as scheduling them. Please note that you cannot create an event without specifying at least one task.
If you select “Advanced Repeating” in the drop-down menu next to ‘Repeats’, you will be able to schedule events for every hour of the day if necessary. This can be useful for injecting commercials or bulletins into the station’s scheduled music programming.
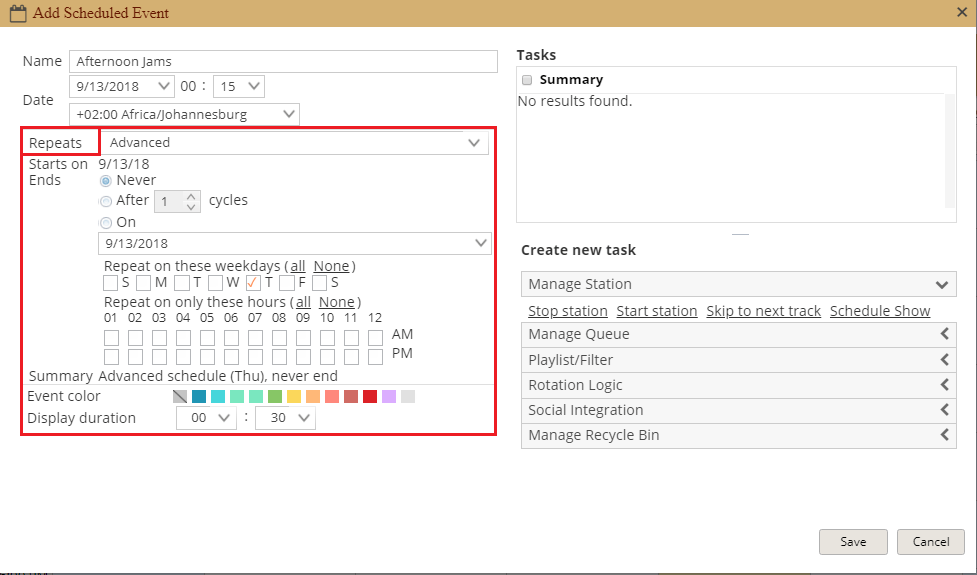
By combining multiple Scheduled Events into your programming using the Advanced Scheduling Options, you can schedule any automated programming you may need.
You should note that the scheduled events will continue to play until the next scheduled event starts. That is, for example, if you have a morning show scheduled at 6 am, and an afternoon show scheduled to begin at 12 midday, the morning show will continue playing until 12 noon when the next event fires.
Doesn’t SAM Cloud’s Automation Scheduling feature sound great? There certainly are plenty of perks in being able to fully automate your internet radio station. If you would like a broader guideline on Automation Scheduling and its various tools, download our comprehensive user guide. To find out more about SAM Cloud’s fantastic Live Broadcasting feature, click here.
If you would like to try your hand at running your own online radio station, try our free trial of SAM Broadcaster Cloud today. You have nothing to lose!