
Voice Tracking Feature- SAM Cloud Product Update
We have some cool news for the Spacial gang! We have added a nifty new Voice Tracking feature to SAM Broadcaster Cloud for your convenience. This new feature allows you to make 10-minute recordings for your station straight from SAM Cloud. This means no more third party software for those quick recordings. This is a great feature for adding in a commercial, clips from an interview or a quick titbit of news between songs on your playlist to give your station that “live” broadcast feel, even when you are not live on air. Here’s how to use it:
Step 1
Once you are logged in and ready for action on your SAM Broadcaster Cloud site, find and click on the mic icon in top-right corner.
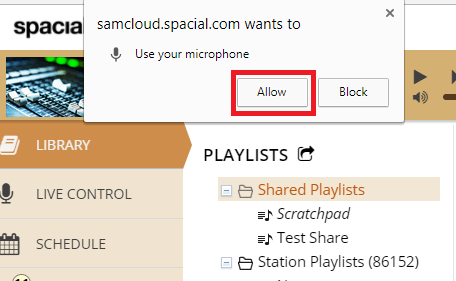
Step 2
![]()
Next, you’ll note a pop-up asking you to allow the use of your microphone; click allow.
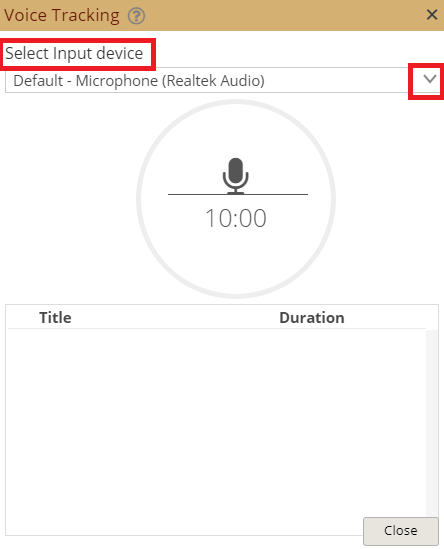
Step 3
Once the Voice Tracking window opens up, you can select the microphone that you would like to use from the drop-down ‘Select Input Device’ menu.
Step 4
Before you start recording, do a quick check to see if your mic picks up the sound. If it works correctly, you will see sound waves as demonstrated below.
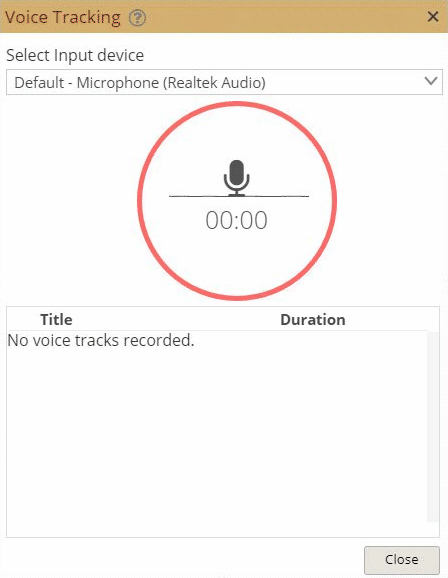
If all works well, click on the mic icon to start recording. The red circle will turn green to indicate that it is recording, and the timer will start counting down from the 10-minute mark. Once you have finished your recording, click on the mic icon once more to stop – it will turn back to red once successfully halted.
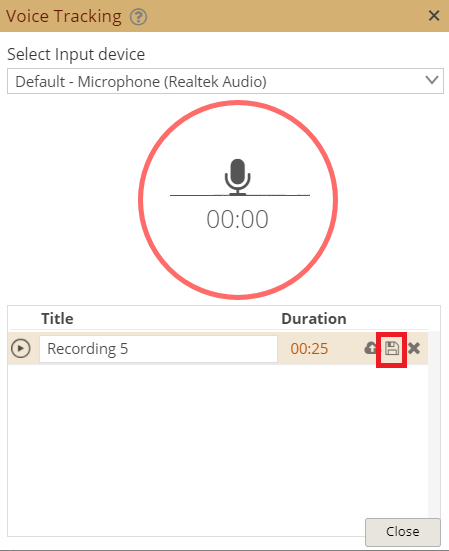
Step 5
Once you have stopped your recording, it will be listed beneath the recording button. You can rename the recording before you save it and upload it to the cloud. To save the recording to your cloud, click on the cloud upload button next to the chosen recording.

You also have the option of saving the recorded file to disk as an MP3 by clicking on the disk icon next to the cloud.
Step 6
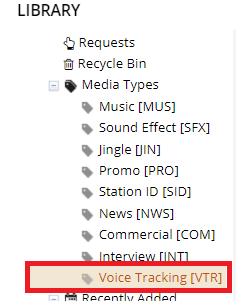
If you want to find your saved recording, go ahead and close the Voice Tracking window and head to Library > Media Types on your user interface and scroll down until you find ‘Voice Tracking’.
Step 7
You will find a list of all your recordings done using Voice Tracking. To edit any one of these clips, just right-click on the chosen recording and choose ‘Audio Editor’.

Step 8
Once you have opened the Audio Editor, your recording may take a moment to load, depending on its size.
Once it has finished loading, you will be greeted with a window much like this one:
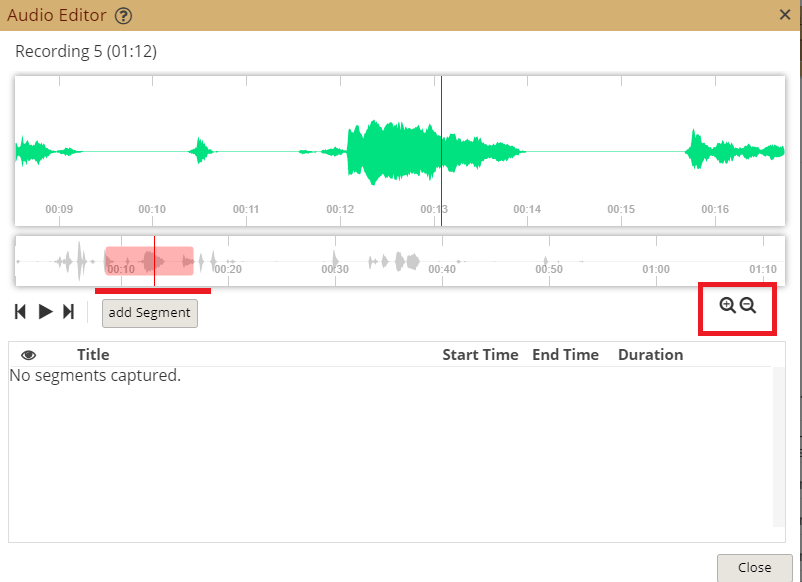
In this window, your recording will be displayed visually. You have the ability to select certain segments (by clicking on add segment) and to cut off segments of the recording. You can choose to zoom in or out on certain areas of the recording too.
Step 9
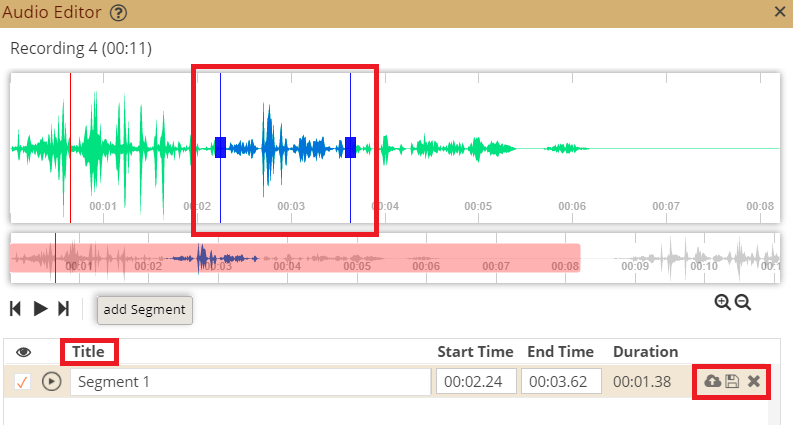
The segment(s) you create will be indicated by the blue lines on the sound bar. Once you have cut out a segment that you would like to use, it will be listed below the soundwave bar. You can then rename the segment(s) and save it to the Cloud or Disk, much like in Step 5.
Pretty cool, huh?
We hope you gain a lot of use and fun out of our fresh SAM Broadcaster Cloud update. If you have not yet checked out our top-notch radio automation software, why not do so today by grabbing a free trial of SAM Broadcaster Cloud?